UE4 - Creating A.I. characters for The Legend of Zelda: Spectral Skies
- Timothy Joyce

- Dec 21, 2020
- 5 min read
Updated: Nov 13, 2023
This is an account of my experience creating projects in Unreal Engine 4. As such, it will include pictures of my early and unfinished work.
What does it do?
I created an NPC which has AI functionality and is designed to engage the player in melee combat and smash any obstacles that get in its way. It is designed to patrol an area of the map and attack the player when provoked. I chose to create an AI because it adds unique challenge to the game, the kind of depth something like a trap can't offer.

Through visual scripting, I was able to give the NPC a distinct personality which makes it feel like a living entity. It is made up of different elements such as sprites and sound effects which make it distinct from the player.
How did I do it?
I developed the AI using blueprints and created a state machine style workflow.

Summary of definitions
Explanations for the terms I'm using.
AI State
I use AI State as the core of my state machine to make controlling AI actions easier. The states rigidly control what the AI does when performing its actions.
Neutral - Wander and perform Idle Actions
Hostile - Move Towards and Attack the Current Target
Defensive - Checking Current Target before reverting to Hostile or Neutral

Navigation Mesh References
These are used to determine where the AI should patrol. They refer to the Navigation Mesh Actor Bounds Volume that the NPC moves within and ensure the NPC doesn't stray outside its Patrol Area.

Overview of system
This is how my system works.
Begin Play
The initial blueprint starts with the AI State set to Neutral, so the AI will Idle and Wander until provoked.

The AI's Current Health and looping flipbook are also set on Begin Play.

Any Navigation Mesh Bounds Volume that contains a tag called Patrol Area will get added to an array, Navigation Mesh References, which is later used to set up the NPC's Patrol Radius.

A timer is set so the AI will update its flipbook based on where the player's camera is, so the correct flipbook is set.

Finally, the AI then performs its Next Action.
Next Action
By going through a switch, depending on the current AI State, the AI will perform an action.
The actions the NPC can perform are:
Idle
Wander
Attack Target
Move Towards Target
Find New Target
This will allow the AI to loop through these so it can decide what it needs to do in certain situations.
Idle & Wander
If the AI State is Neutral, the NPC will perform one of two actions. Either, the NPC will stand still and perform an Idle Action such as jumping or it will Wander and move to a random point within the Patrol Radius.

Move Towards Target
While chasing the player, the AI will check to see if they are within range before stopping and attempting an attack, and if the AI bumps into a destructible while Hostile, they will smash it.

Find New Target
If the AI State is set to Hostile it will go through three steps:
Find New Target -> Check Attack Range -> Attack Target
To find out if an Actor is close enough, the NPC searches the area around it using a box trace and sets its Current Target to the hit result of the box trace (The NPC will always priortise the Player if it gets multiple hit results). If the box trace didn't return any hit results, then the AI State will set to Defensive and the NPC will perform Find New Target again.

Attack Range
If the NPC's Current Target is valid then the NPC will check to see if it is close enough to attack. If so, then the NPC will perform Attack Target and perform a line trace to hit anything within its attack cone. If not, it will move towards the target instead.

Attack Target
When attacking, the NPC will perform a line trace in its facing direction and apply damage to anything it hits. For example, if the NPC hits a breakable pot, the pot will shatter when damage is applied.


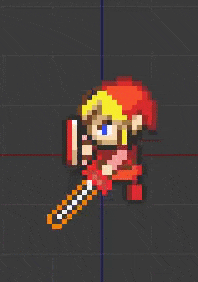
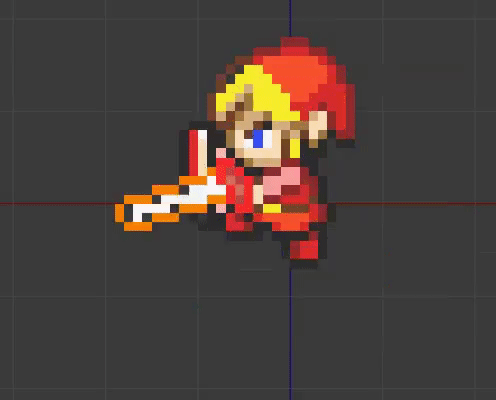
Graphics
The NPC uses different sprites to form flipbooks. The NPC has separate flipbooks for all of its actions including walking, attacking and jumping. The flipbook is set based on the Camera Direction, Last Move Direction and Action.


Reflections
Looking back on my work.
Trial and error
Whilst the end result is a fully functioning AI, I overcame many challenges getting to this point and there was much trial and error. I had several bugs with the AI, especially with the flipbooks. Often, the sprite flipbooks wouldn't update correctly due to flow problems within the blueprint, for example, the NPC would display the wrong sprite flipbook when it attacked and would have incorrect rotation.
Initially, I used UE4's Auto Extract tool to extract my sprites from my sprite sheet. However, this proved to be difficult because the tool didn't size each sprite equally, which resulted in inaccurate flipbooks. I eventually decided to extract the sprites manually using Photoshop and this turned out much more accurate results.
Below is an example of auto extracting (left) versus manually extracting (right):

I also encountered a problem where Calculate Flipbook Angle would cease to work if the NPC killed the Player. The NPC would lose its Current Target and thus wouldn't use the correct Player camera to update its flipbook. To fix this, I created a custom event that would fire if the Player was dying and set the Player back to the Current Target after respawning.

What I would like to add
I would like to expand the NPC's capabilities, for example:
Ranged attacks
Magic
Lay traps for the player
Transitioning from level to level through doors
Adding a Friendly AI State
Jumping over obstacles
Horseback riding
Pushing/pulling obstacles
Using items such as bombs when Hostile or lamps when Idle
What I learnt
Creating the AI introduced me to many concepts, including:
Line traces to get hit results
Managing Arrays
Applying damage
Logic branches
Death animations
Timers to trigger custom events
Is Valid nodes
Managing references for destructible meshes - Due to the nature of destructible meshes they'll get broken and 'killed' easily which required array management
Custom object types, channels and trace responses - This allows the NPC to distinguish between a Player and a destructible
Enumerators - These allowed me to create switches and change the AI State
Structs - I used these to store the attack flipbooks that the NPC uses
Managing variables - I created many different variables for the AI which represented values such as sprite timers
Casting - The NPC makes a lot of casts in its blueprint which return variables from other Actors such as the Player
Creating Functions - Functions helped me condense my code and keep it tidy
For loops - For loops allowed me to search arrays in order to return specific elements from them
Macros - I used macros when modifying the health values of the NPC
Comments - I commented my work as I went to help me remember what certain pieces of code did
Prints - I printed many different variable values to debug my AI and help solve problems
Breakpoints - If I ever encountered a problem with code, I used a breakpoint with the debugger to help identify problems


Comments